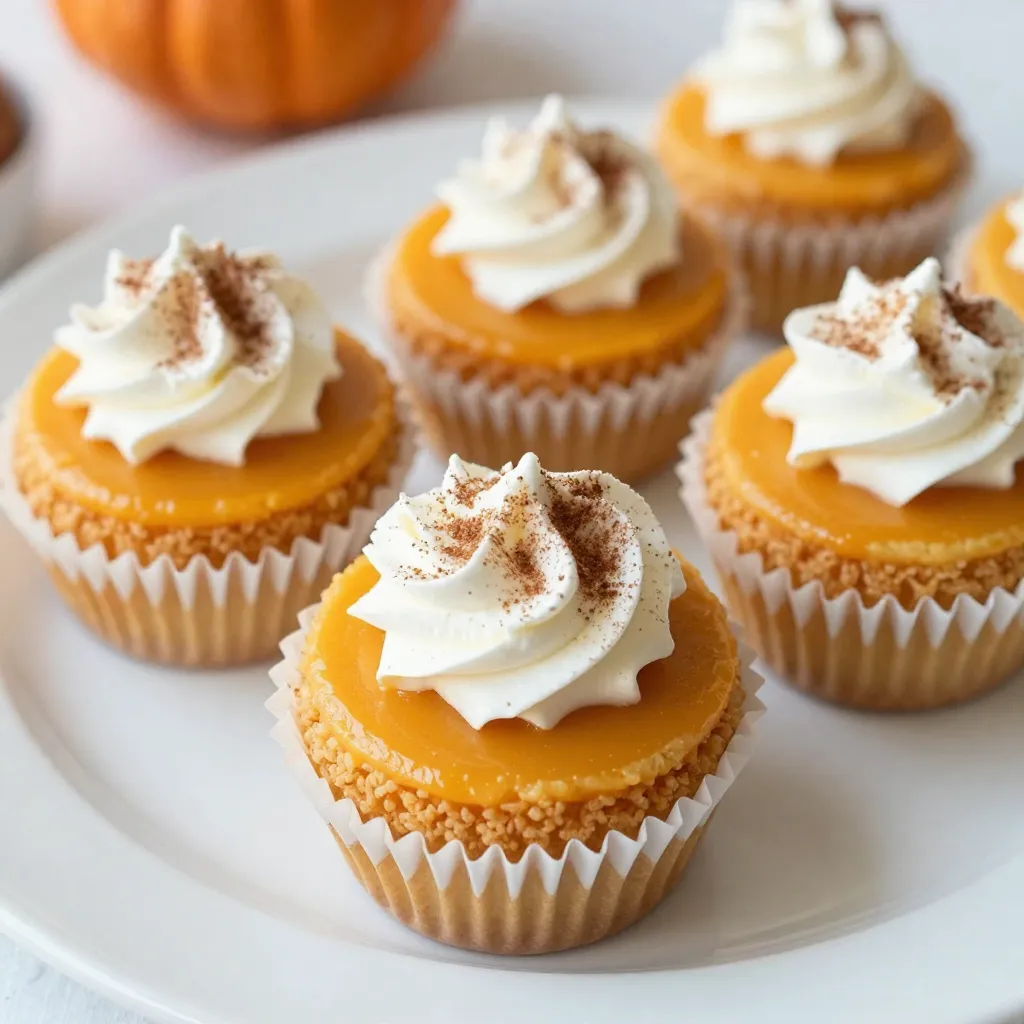
Get ready to indulge in the delightful world of mini pumpkin cheesecakes! These cute treats are not just easy to make; they are also packed with flavor. Whether you’re hosting a fall gathering or simply craving something sweet, these mini cheesecakes will impress your guests and satisfy your taste buds. Join me as we explore the simple ingredients, clear steps, and helpful tips to create these delightful desserts. Let’s dive in!
Why I Love This Recipe
- Perfect for Fall: These mini pumpkin cheesecakes capture the essence of autumn with their delightful pumpkin flavor and warm spices.
- Individual Servings: These cheesecakes are the ideal portion size, making them perfect for sharing or enjoying on your own.
- Easy to Make: With simple ingredients and straightforward steps, this recipe is accessible for bakers of all skill levels.
- Deliciously Creamy: The creamy texture of the cheesecake paired with the crunchy graham cracker crust creates a delightful contrast in every bite.
Ingredients
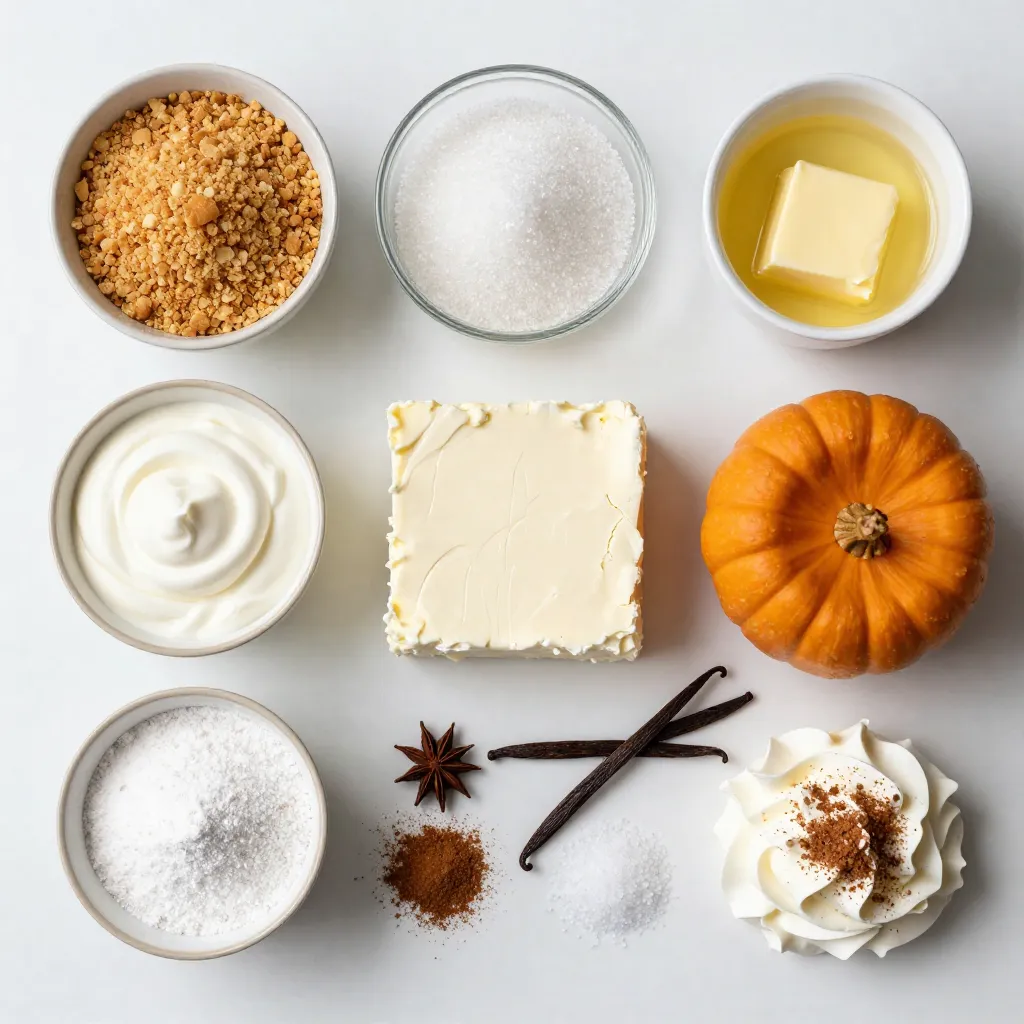
List of Ingredients
– 120 grams graham cracker crumbs
– 50 grams granulated sugar
– 115 grams unsalted butter, melted
– 227 grams cream cheese, softened
– 120 grams canned pumpkin puree
– 60 grams sour cream
– 60 grams powdered sugar
– 5 grams vanilla extract
– 5 grams pumpkin pie spice
– 1 gram salt
– Whipped cream, for topping
– Ground cinnamon, for garnish
You can easily swap ingredients to fit your taste. For a gluten-free option, use gluten-free graham crackers. If you want a lower-fat version, choose a light cream cheese. Greek yogurt can replace sour cream for a tangy twist. Remember, these swaps can change the taste slightly, but they still keep the treat enjoyable.
Step-by-Step Instructions
Preparation Steps
1. Preheat the Oven: Set your oven to 325°F (160°C). This helps the mini cheesecakes bake evenly.
2. Make the Crust: In a medium bowl, mix together:
– 1 cup graham cracker crumbs
– 1/4 cup granulated sugar
– 1/2 cup melted unsalted butter
Combine these until they look like wet sand. Firmly press about 1 tablespoon of this mix into the bottom of each muffin cup. This creates a nice, sturdy crust.
3. Prepare the Cheesecake Filling: In a separate mixing bowl, beat 8 oz of softened cream cheese until smooth. Then add:
– 1/2 cup canned pumpkin puree
– 1/4 cup sour cream
– 1/2 cup powdered sugar
– 1 teaspoon vanilla extract
– 1 teaspoon pumpkin pie spice
– 1/4 teaspoon salt
Mix everything until it’s creamy and well blended. Make sure there are no lumps.
4. Fill the Cups: Spoon the cheesecake filling into each muffin cup. Fill them about 2/3 full to allow room for rising.
5. Bake: Place the muffin tin in the oven. Bake for 18-20 minutes. The edges should be set, but the centers can still jiggle a little.
6. Cool Down: After baking, turn off the oven and crack open the door. Let the cheesecakes cool inside for about 10 minutes. After that, move them to a wire rack to cool completely.
7. Chill: Once they are cool, place the mini cheesecakes in the fridge. Chill them for at least 2 hours. This helps them set properly.
8. Serve: Before serving, add a dollop of whipped cream on top of each cheesecake. Finish with a sprinkle of ground cinnamon for extra flavor. Enjoy your tasty treat!
Tips & Tricks
Baking Tips
How do I avoid cracks in cheesecake?
To avoid cracks, do not overbeat your filling. Mix just until smooth. Also, bake at a low temperature. This helps the cheesecake cook evenly.
What are optimal cooling techniques?
After baking, turn off the oven and crack the door open. Let the cheesecakes cool inside for about ten minutes. Then, move them to a wire rack to cool fully. This helps prevent sudden temperature changes.
How can I ensure even baking?
Be sure to fill your muffin cups evenly. This allows all cheesecakes to bake at the same rate. Also, rotate your muffin tin halfway through baking. This helps with even heat distribution.
Pro Tips
- Use Room Temperature Ingredients: Ensure that your cream cheese and sour cream are at room temperature before mixing. This helps achieve a smoother, creamier filling without lumps.
- Don’t Overbake: Keep an eye on your mini cheesecakes while they bake. They should be set around the edges but still slightly jiggly in the center for the perfect texture.
- Chill Before Serving: For the best flavor and texture, refrigerate the cheesecakes for at least 2 hours before serving. This allows them to firm up nicely.
- Customize Toppings: Get creative with your toppings! Consider adding caramel sauce, chocolate drizzle, or even nuts for added texture and flavor.
Variations
Flavor Enhancements
You can easily change up mini pumpkin cheesecakes to suit your taste. Here are some fun ideas:
– Adding chocolate or caramel: Swirl in melted chocolate or caramel into the cheesecake filling. This adds a rich layer of flavor that balances the pumpkin. Drizzle more on top for extra sweetness.
– Using different spices or extracts: Try adding nutmeg, ginger, or even maple extract. Each spice brings a unique twist to the flavor. Experimenting with these spices makes the cheesecake even more special.
– Alternative crust options: If you want a different base, use crushed Oreos or vanilla wafers instead of graham crackers. Each option adds its own flavor and texture to the mini cheesecakes.
These simple changes can make your mini pumpkin cheesecakes exciting and new each time!
Storage Info
Best Practices for Storage
To keep your mini pumpkin cheesecakes fresh, first, let them cool completely. Place them in an airtight container. You can layer them with parchment paper to avoid sticking. Store them in the fridge. They will last up to five days.
If you want to freeze them, follow these steps. Wrap each cheesecake tightly in plastic wrap. Then, place them in a freezer-safe bag. They can stay frozen for up to three months. When you’re ready to enjoy them, transfer the cheesecakes to the fridge overnight.
Reheating isn’t usually needed, but if you prefer them warm, here’s how. Preheat your oven to 300°F (150°C). Place the cheesecakes in an oven-safe dish. Heat them for about 10 minutes. This will gently warm them without drying them out. Enjoy every bite!
FAQs
Can I make these mini cheesecakes ahead of time?
Yes, you can make these mini cheesecakes a day in advance. Just bake them and let them cool. Once cooled, cover them with plastic wrap or put them in an airtight container. Store them in the fridge until you are ready to serve. They taste great when chilled!
What can I use instead of sour cream?
If you don’t have sour cream, you can use plain yogurt. Greek yogurt works well too. It gives a nice creamy texture and a bit of tang. You can also try cream cheese or buttermilk for a different taste. Just make sure to keep the same amount.
How do I know when they are done baking?
You can tell the mini cheesecakes are done when the edges look set. The centers should still jiggle a bit. This means they are soft and creamy inside. Bake them for about 18 to 20 minutes at 325°F (160°C). After baking, let them cool in the oven for a few minutes, then check again.
This blog post covered everything you need to know about making mini cheesecakes. I shared a detailed list of ingredients and options for substitutions. You found step-by-step instructions for both crust and filling. Helpful tips keep your cheesecakes smooth and even. We explored tasty flavor variations for extra fun. Finally, I included best practices for storing and reheating. With these insights, you can create delightful mini cheesecakes with confidence. Enjoy baking and sharing your treat