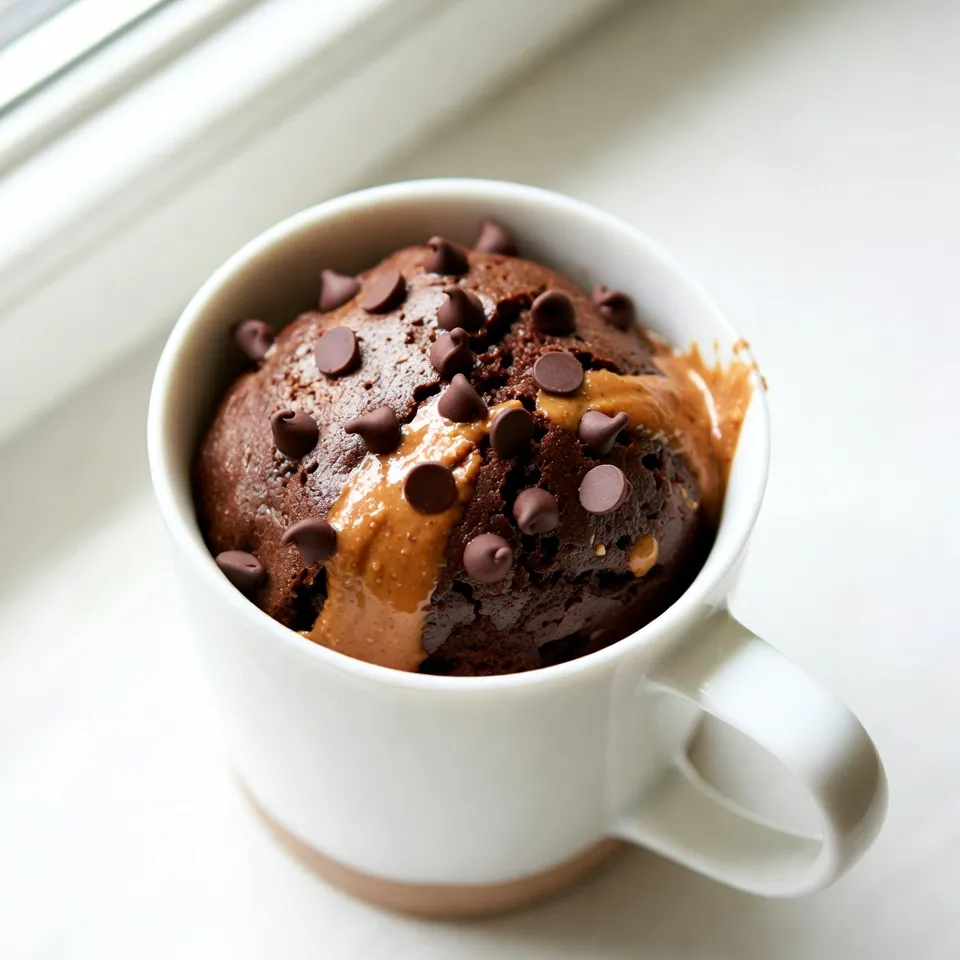
Craving a sweet fix that’s quick and easy? You’re in for a treat! This Chocolate Peanut Butter Mug Cake is a delightful dessert ready in minutes. With just a few ingredients and simple steps, you can whip up a warm, gooey cake that satisfies your chocolate and peanut butter cravings. Let’s dive into this simple recipe and get you baking your own tasty mug cake today!
Why I Love This Recipe
- Quick and Easy: This mug cake can be whipped up in just 5 minutes, making it a perfect last-minute dessert or snack.
- Decadent Flavor: The combination of chocolate and peanut butter creates a rich, indulgent flavor that satisfies any sweet tooth.
- Customizable: You can easily add chocolate chips or nuts to the batter for extra texture and flavor, tailoring it to your preferences.
- Single Serving: This recipe is designed for one, so you can enjoy a delicious treat without the temptation of leftovers!
Ingredients
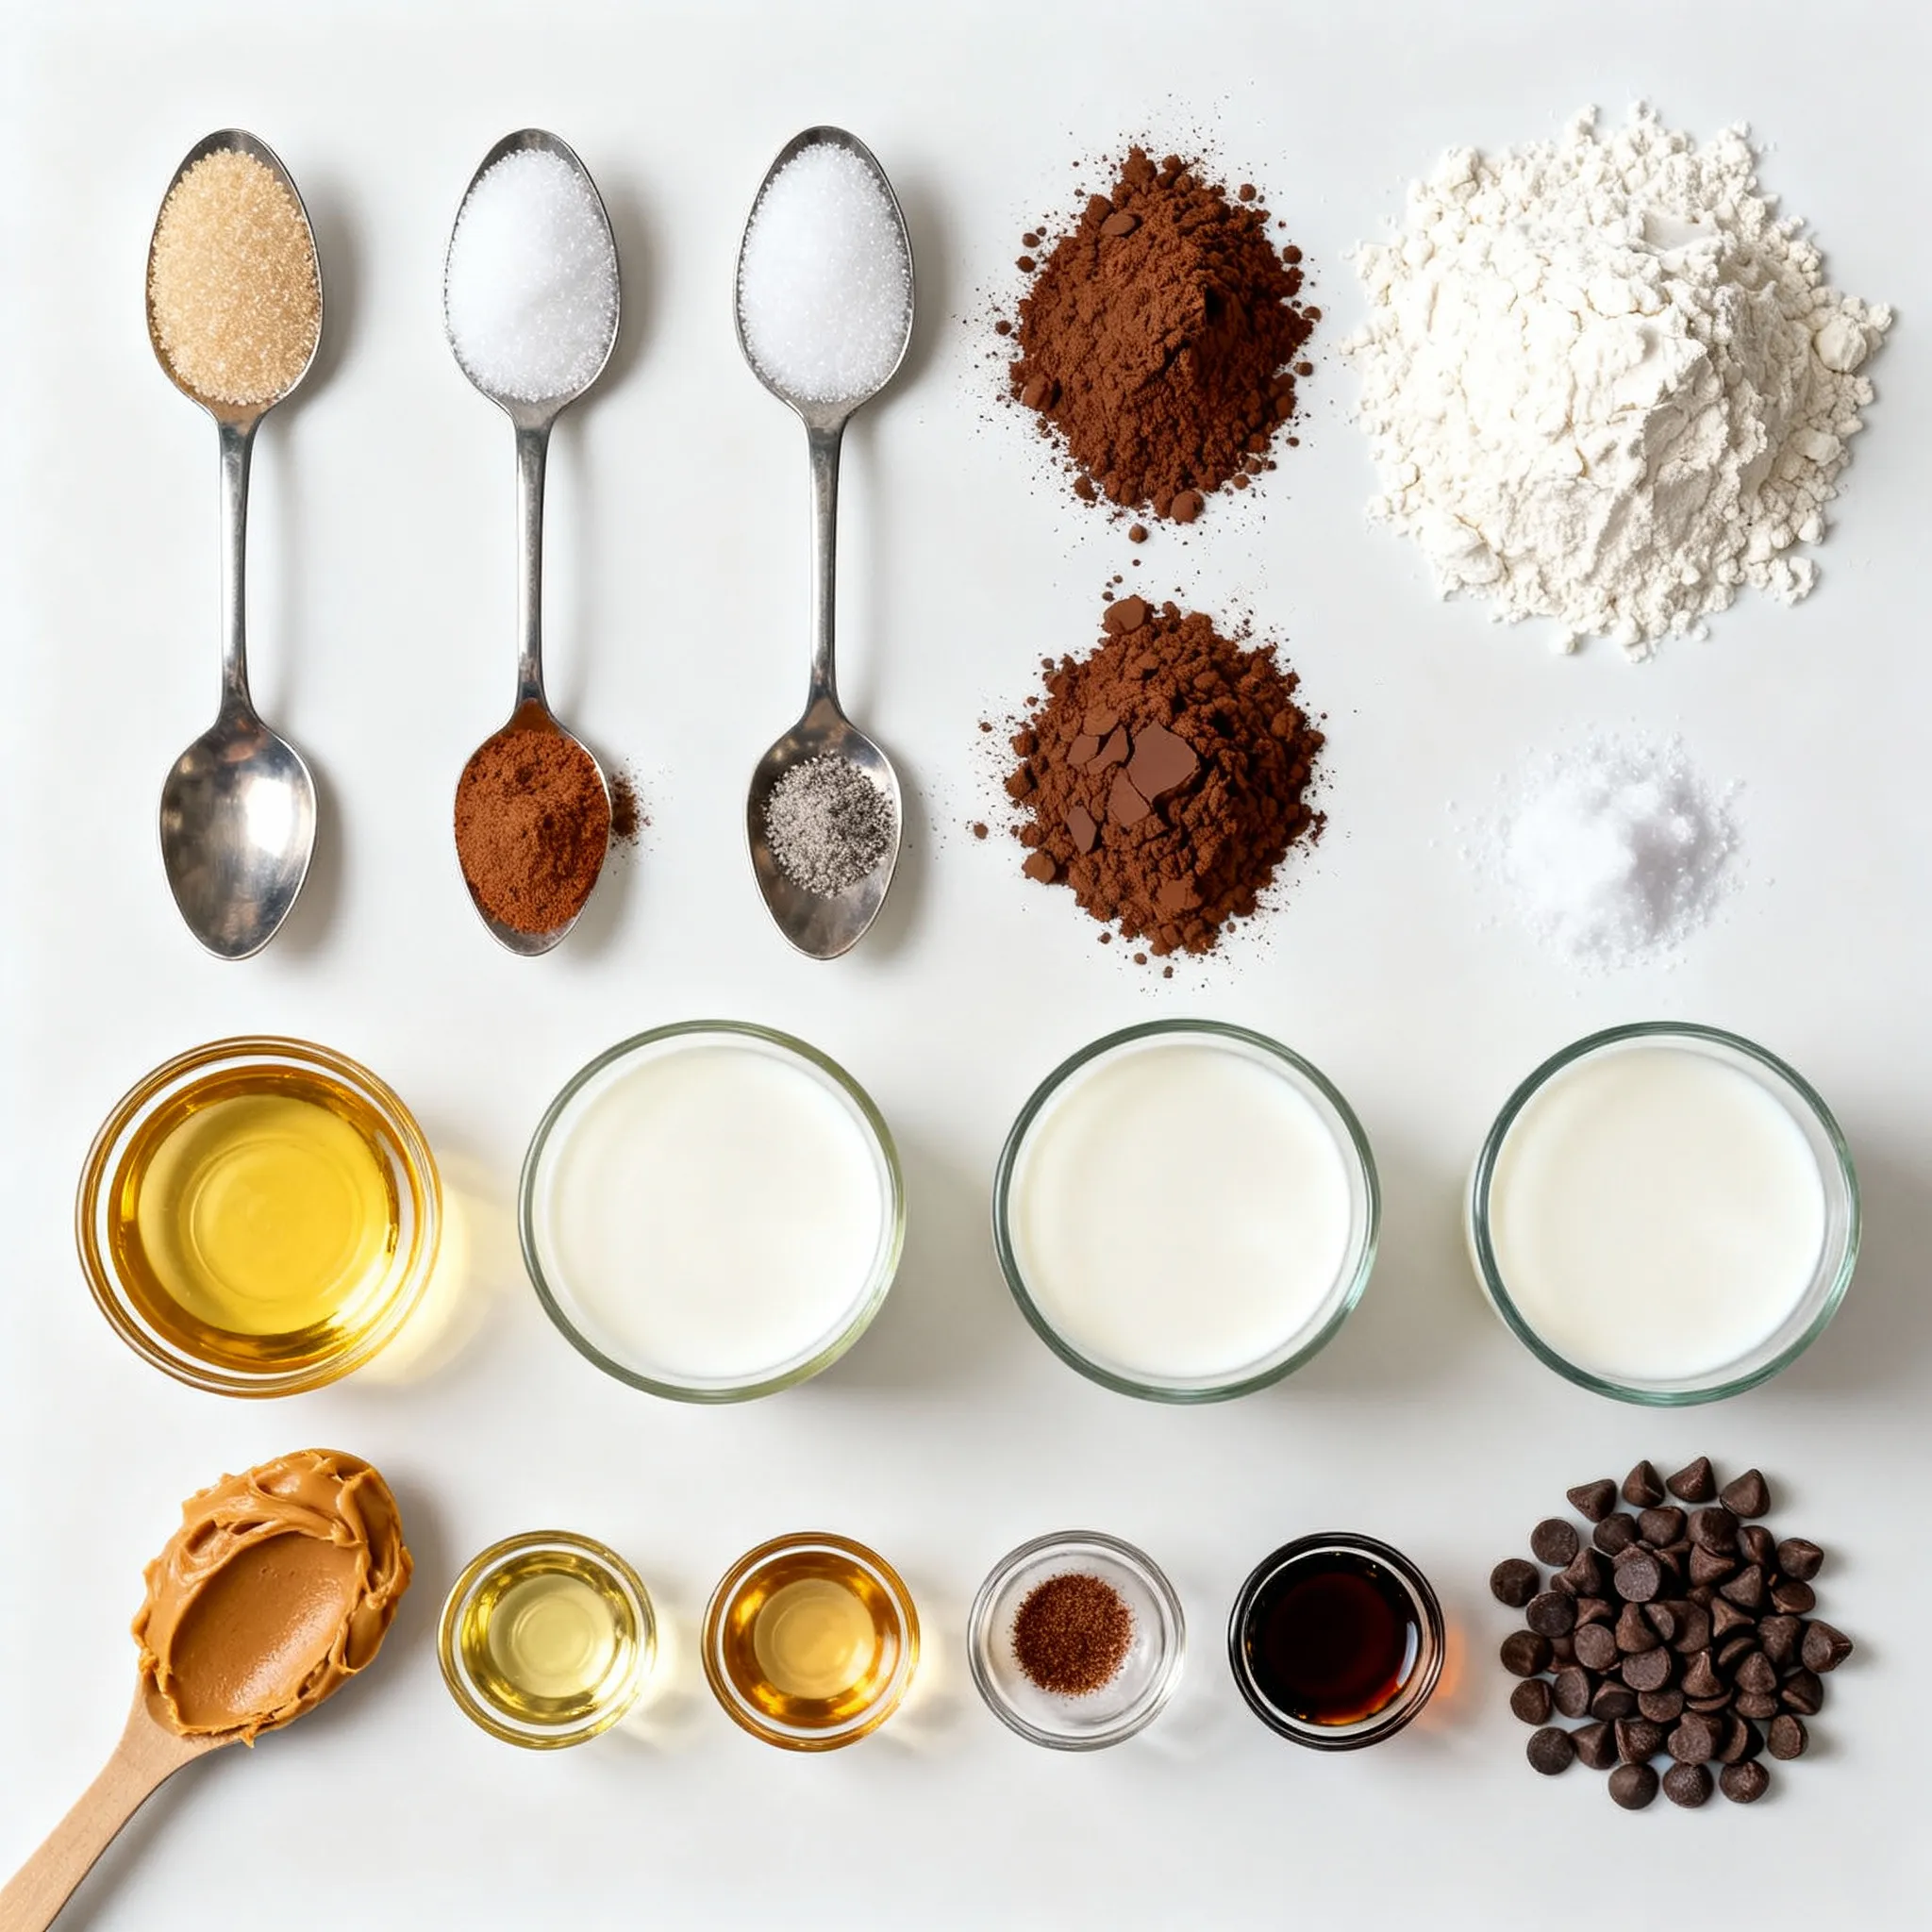
To make a Chocolate Peanut Butter Mug Cake, you need a few simple ingredients. Here’s the list of what you will need:
– 4 tablespoons all-purpose flour
– 4 tablespoons granulated sugar
– 2 tablespoons unsweetened cocoa powder
– 1/8 teaspoon baking powder
– 1/8 teaspoon salt
– 4 tablespoons milk (or dairy-free alternative)
– 2 tablespoons vegetable oil
– 1 tablespoon creamy peanut butter (plus extra for topping)
– 1/4 teaspoon vanilla extract
– Optional: chocolate chips for added texture
Each ingredient plays an important role. The flour gives the cake structure, while sugar adds sweetness. Cocoa powder brings rich chocolate flavor. Baking powder helps the cake rise, and salt enhances all the flavors.
For a twist, you can add chocolate chips. They melt and add a gooey texture. You can also use a dairy-free milk if needed. This recipe is flexible, so feel free to adjust it to your taste!
Step-by-Step Instructions
Let’s dive into making this chocolate peanut butter mug cake. It’s quick and easy!
Preparation Steps
– Mixing dry ingredients
Start with a microwave-safe mug. Use a 12 oz mug or larger. Add 4 tablespoons of all-purpose flour. Next, mix in 4 tablespoons of granulated sugar. Then, add 2 tablespoons of unsweetened cocoa powder. Sprinkle in 1/8 teaspoon of baking powder and 1/8 teaspoon of salt. Use a fork or small whisk to blend everything well.
– Adding wet ingredients
Now it’s time to add the wet stuff. Pour in 4 tablespoons of milk or a dairy-free alternative. Next, add 2 tablespoons of vegetable oil. Then, scoop in 1 tablespoon of creamy peanut butter. Don’t forget 1/4 teaspoon of vanilla extract for extra flavor. Mix everything until you have a smooth batter. If you want, fold in some chocolate chips for a special treat.
– Microwave cooking process
Place the mug in the microwave. Cook on high for 40 to 60 seconds. Start with 40 seconds and check the cake. It should rise and look set in the middle. If it’s still wet, microwave in 10-second bursts until it’s done. Let the mug cake cool for about one minute. Top it with a drizzle of peanut butter or extra chocolate chips if you like. Enjoy your delicious chocolate peanut butter mug cake!
Tips & Tricks
Cooking Tips
To ensure your mug cake rises properly, use a large mug, at least 12 oz. This gives the cake room to grow. Mix the dry ingredients well before adding wet ones. This step helps blend the flavors. When you microwave, start with 40 seconds, then check. If it looks wet, add 10 more seconds. Each microwave is different, so keep an eye on it.
Common mistakes to avoid include using too small a mug. This can cause spills or overflow. Don’t skip the baking powder; it’s vital for rising. Also, be careful not to overcook. A dry cake is not as tasty. Aim for a soft, moist center for the best flavor.
Presentation Ideas
For serving suggestions, you can keep it simple. Serve in the mug for a cozy feel. If you want something fancier, flip it onto a plate. This gives a nice look. You can add a scoop of vanilla ice cream or whipped cream. This adds sweetness and creaminess.
Garnishes can enhance flavors. A drizzle of creamy peanut butter on top works well. You can also sprinkle chocolate chips for extra fun. Fresh berries or a mint leaf can add color. These small touches make your treat feel special.
Pro Tips
- Use a Bigger Mug: To prevent overflow, choose a mug that is at least 12 oz to give the cake room to rise while microwaving.
- Check Microwave Power: Microwaves vary in power; adjust cooking time accordingly. If your mug cake is not set after the initial 60 seconds, continue in 10-second increments.
- Add a Flavor Boost: Experiment with different nut butters or add a pinch of cinnamon to enhance the flavor profile of your mug cake.
- Serving Suggestions: Top your mug cake with a scoop of ice cream, whipped cream, or fresh berries for a delightful dessert experience!
Variations
Flavor Combinations
You can easily customize your chocolate peanut butter mug cake to suit your taste. Here are some fun ideas:
– Nuts: Add chopped walnuts or pecans for a crunchy twist.
– Chocolate Chips: Mix in some chocolate chips for extra gooeyness.
– Fruit: Try adding banana slices or berries for a fruity touch.
For toppings, consider:
– Whipped Cream: A dollop adds creaminess and sweetness.
– Ice Cream: A scoop of vanilla ice cream makes it even more special.
– Peanut Butter Drizzle: Drizzle extra creamy peanut butter on top for a rich finish.
Dietary Substitutions
You can easily make this cake fit your dietary needs. Here are some options:
– Dairy-Free: Use almond milk or soy milk instead of regular milk. This keeps it creamy without dairy.
– Gluten-Free: Swap all-purpose flour with almond flour or a gluten-free flour blend. This keeps the cake soft and enjoyable.
These simple changes let you enjoy your mug cake while staying true to your diet.
Storage Info
Leftover Storage
If you have leftover mug cake, store it in an airtight container. This keeps it fresh. Place the cake in the fridge if you won’t eat it right away. It will stay good for up to two days.
To reheat, put the mug cake in the microwave. Heat it for about 10-15 seconds. Check if it is warm enough. If not, heat it a few more seconds. Be careful not to overheat it, or the cake may become dry.
Freezing Options
You can freeze the mug cake batter or the cooked cake. For the batter, pour it into a freezer-safe container. Seal it tightly. When you want to bake, let it thaw in the fridge overnight before cooking.
If you freeze the cooked cake, let it cool first. Wrap it in plastic wrap and then in foil. This helps avoid freezer burn. To eat, thaw it in the fridge. Then reheat as described above. Enjoy your tasty treat anytime!
FAQs
Common Questions
How do I make a mug cake without eggs?
You can easily skip the eggs. Just use more milk to keep it moist. You can add an extra tablespoon of milk. This keeps the cake soft and fluffy.
Can I use a different type of flour?
Yes, you can! Try using whole wheat flour or almond flour. Just remember, each flour may change the texture a bit. Start with the same amount and adjust as needed.
What if my mug cake is too dry or too soggy?
If it’s dry, add a splash more milk next time. If it’s too soggy, try cooking it a bit longer. Microwave times can vary, so check it often.
How do I make multiple mug cakes at once?
You can prepare each mug cake in separate mugs. Just multiply the ingredients by the number of servings you need. Cook each mug cake one at a time in the microwave for best results.
This blog post provided a complete guide to making a mug cake. We covered the key ingredients, detailed steps, and helpful tips to cook with ease. You can explore various flavor combinations and dietary options to suit your taste. Remember to store any leftovers properly and know how to reheat them.
Mug cakes are fun and quick to make. They can fit your cravings and dietary needs. Enjoy creating and customizing your special mug cak