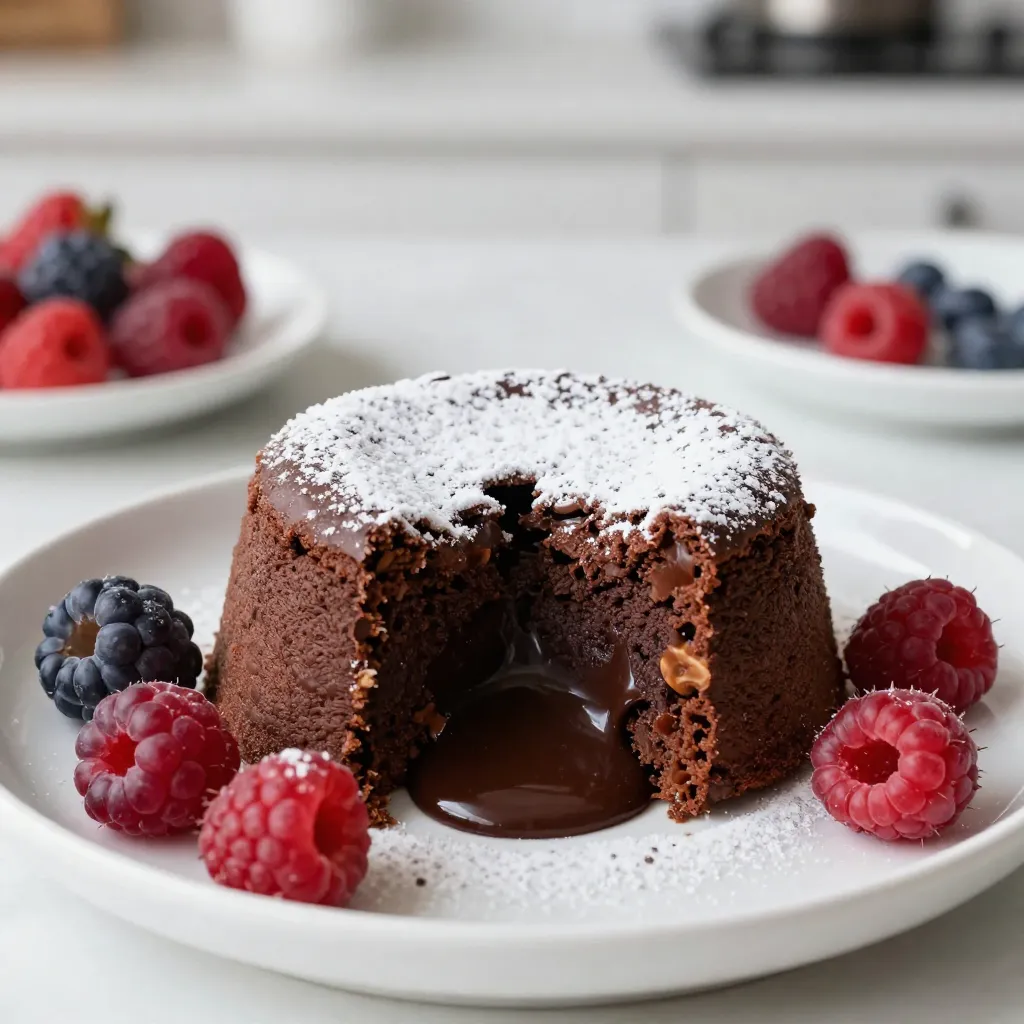
Get ready to treat yourself! This Chocolate Hazelnut Lava Cake is an irresistible dessert delight that melts in your mouth. With its rich, gooey center and the nutty crunch of hazelnuts, every bite promises pure bliss. Whether you’re a baking pro or a beginner, my step-by-step guide makes it easy to impress. Let’s dive in and create this sweet masterpiece together, perfect for any occasion!
Why I Love This Recipe
- Indulgent Flavor: This lava cake combines rich dark chocolate with the nutty crunch of hazelnuts, creating an irresistible dessert experience.
- Easy to Make: With just a few simple steps, you can whip up a restaurant-quality dessert that will impress your guests.
- Perfect for Sharing: These individual servings are perfect for sharing, making them a great choice for dinner parties or special occasions.
- Decadent Presentation: When you cut into the cake, the gooey chocolate center flows out beautifully, making for a stunning presentation.
Ingredients for Chocolate Hazelnut Lava Cake
List of Ingredients
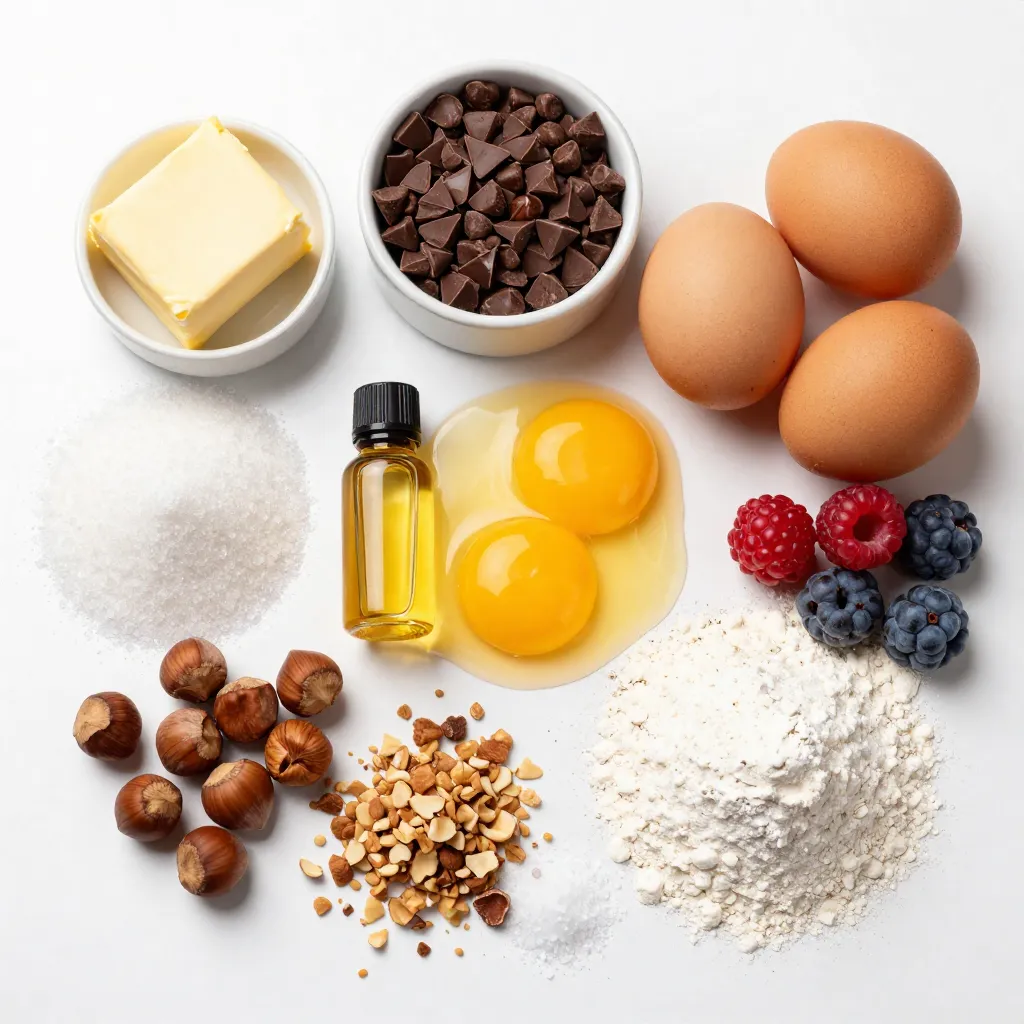
To make a tasty chocolate hazelnut lava cake, gather these ingredients:
– 1/2 cup (115g) unsalted butter, plus extra for greasing
– 1 cup (170g) dark chocolate chips (70% cocoa)
– 1/2 cup (100g) granulated sugar
– 2 large eggs
– 2 large egg yolks
– 1/4 teaspoon vanilla extract
– 1/4 cup (30g) all-purpose flour
– 1/4 cup (35g) finely chopped hazelnuts
– Pinch of salt
– Optional: powdered sugar and fresh berries for garnish
These ingredients create a rich and gooey dessert. The dark chocolate gives it a deep flavor, while the hazelnuts add crunch.
Substitutions and Modifications
You can make some swaps if you need to. For butter, use coconut oil for a dairy-free option. Dark chocolate can be replaced with semi-sweet chocolate if you want a sweeter cake. If you have nut allergies, leave out the hazelnuts. You can add more flour to keep the texture, but it will change the taste.
Equipment Needed
To create this dessert delight, you will need:
– Ramekins (6 oz size)
– Baking sheet
– Mixing bowls
– Microwave-safe bowl
– Whisk or electric mixer
– Sifter
Having the right tools makes the process easier. Grease your ramekins well to avoid sticking. This cake is all about presentation, so nice ramekins help.
Step-by-Step Instructions
Preheating and Preparing Ramekins
I start by preheating the oven to 425°F (220°C). This step is key for a good bake. Next, I take four 6-ounce ramekins and grease them with butter. I then dust them lightly with flour. This helps the cakes come out easily after baking.
Melting Chocolate and Butter
For the next step, I grab a microwave-safe bowl. I add 1/2 cup of unsalted butter and 1 cup of dark chocolate chips. I microwave this in 30-second bursts. After each burst, I stir until everything is melted and smooth. Once melted, I let it cool for a few minutes.
Mixing Wet Ingredients
In a separate bowl, I whisk together 1/2 cup of granulated sugar, 2 large eggs, 2 large egg yolks, and 1/4 teaspoon of vanilla extract. I mix until the mixture looks light and frothy. This adds air and makes the cakes fluffy.
Combining Dry Ingredients
Now, I sift 1/4 cup of all-purpose flour and a pinch of salt over the wet mixture. I also add 1/4 cup of finely chopped hazelnuts. Gently, I fold these dry ingredients into the chocolate mixture. I take care not to overmix; I want to keep it light.
Baking Instructions
I divide the batter evenly into the prepared ramekins. To make it easy, I place the ramekins on a baking sheet. I bake them in the preheated oven for 12 to 14 minutes. The edges should be firm, but the center must stay soft.
Serving Suggestions
Once baked, I take them out and let them cool for just 1 minute. I run a knife around the edges to help them come out. Then, I flip each ramekin onto a plate. I like to dust them with powdered sugar and serve them with fresh berries for a nice touch.
Tips & Tricks for Perfect Lava Cakes
Achieving the Liquid Center
To get that gooey center, bake the cakes for just the right time. I recommend 12 to 14 minutes. The edges should look firm while the center stays soft. You can check by gently shaking the ramekin. If it wiggles, it’s perfect! Letting them cool for one minute before flipping helps too. This allows the center to settle slightly, keeping it runny when you cut into it.
Common Mistakes to Avoid
One common mistake is overmixing the batter. This can make your cakes dense instead of light. Another mistake is baking them too long. This ruins the lava effect. Always keep an eye on the timer! Also, make sure your ramekins are well-greased and floured. This prevents sticking and helps your cakes come out smoothly.
How to Serve and Enjoy
Serving your chocolate hazelnut lava cakes is easy and fun! Flip them onto plates for a lovely presentation. Dust with powdered sugar for a sweet touch. You can add fresh berries for color and flavor. Serve them warm, as this keeps the center gooey. For a twist, try pairing them with vanilla ice cream. The warm cake and cold ice cream make a delightful combo!
Pro Tips
- Use Quality Chocolate: For the best flavor, choose high-quality dark chocolate with at least 70% cocoa. It will enhance the richness of your lava cake.
- Don’t Overbake: Keep a close eye on the baking time. The key to a perfect lava cake is a gooey center, so bake until the edges are set but the center is still soft.
- Chill the Batter: If you have time, chilling the batter for 30 minutes before baking can help the cakes maintain their shape and improve the texture.
- Experiment with Fillings: Try adding a spoonful of Nutella or a piece of chocolate in the center before baking for an extra surprise!
Variations on Chocolate Hazelnut Lava Cake
Alternative Nuts and Fillings
You can switch hazelnuts for other nuts. Try walnuts or pecans for a new taste. Each nut brings its own flavor and crunch. You could also add different fillings. Consider using caramel or peanut butter. These flavors mix well with chocolate. They can create a fun twist on the classic lava cake.
Gluten-Free Options
To make a gluten-free version, swap the all-purpose flour. Use almond flour or coconut flour instead. These flours work well in this recipe. They keep the texture light and fluffy. Just be sure to adjust the amounts since these flours absorb moisture differently. This way, everyone can enjoy a delicious lava cake.
Chocolate Lava Cake with Different Flavors
You can play with flavors in your lava cake too. Add a splash of orange zest for a citrus kick. Or mix in a bit of espresso powder for a coffee flavor. Even a hint of mint can brighten the taste. Each variation lets you explore your own tastes. Don’t be afraid to get creative!
Storage Info
How to Store Leftovers
After enjoying your chocolate hazelnut lava cake, let any leftovers cool down. Place them in an airtight container. Store the container in the fridge for up to three days. This keeps the cakes fresh and tasty.
Reheating Instructions
When you want to enjoy your lava cake again, preheat your oven to 350°F (175°C). Remove the cake from the fridge and take it out of the container. Place it in an oven-safe dish. Heat for about 8-10 minutes. This warms the cake without drying it out. The center should still be gooey and delicious.
Freezing for Later Use
If you want to save the lava cakes for a longer time, you can freeze them. Let the cakes cool completely, then wrap each one tightly in plastic wrap. Place the wrapped cakes in a freezer bag or a container. They can stay in the freezer for up to two months. When you’re ready to eat, thaw them overnight in the fridge and reheat as mentioned before.
FAQs about Chocolate Hazelnut Lava Cake
Can I make this recipe ahead of time?
Yes, you can prepare the batter ahead. Mix everything and fill the ramekins. Cover them with plastic wrap and store in the fridge. Bake them when you are ready to serve. Just add a minute or two to the baking time.
What can I serve with chocolate lava cake?
You can enjoy it with a scoop of vanilla ice cream or whipped cream. Fresh berries, like strawberries or raspberries, add a nice touch. A drizzle of chocolate sauce or caramel can make it even better.
How do I know when the lava cake is done?
Look for firm edges and a soft center. The tops should look set but still jiggle slightly when you move them. If the edges puff up, they might be overbaked.
Is there a vegan version of this recipe?
Yes, you can make a vegan lava cake. Use vegan butter and dark chocolate. Replace the eggs with flax eggs or unsweetened applesauce. The texture may differ but will still be tasty.
Can I use milk chocolate instead of dark chocolate?
You can use milk chocolate, but the flavor will be sweeter and less rich. Adjust the sugar to balance the sweetness. Milk chocolate melts well, so it will still work in the recipe.
You learned how to make a delicious chocolate hazelnut lava cake. We covered key ingredients, helpful tips, and common mistakes. You now know how to achieve a gooey center and serve it well. Remember, there are variations to explore and ways to store leftovers. Don’t hesitate to try different flavors or fillings. Baking can be fun, and this dessert is sure to impress. Enjoy every bite, and happy bakin